


Love Your Longarmer - Advise Column of Tips & Tricks

We all love our longarmer, incorporating techniques to show them you love them helps everyone! The easier your quilt is to quilt, the faster it is completed and that helps everyone in line behind you waiting for their quilt to be returned!
Lets talk pressing!
Should quilt seams be pressed to the side or pressed open?
It really depends on the project and how the individual quilter likes to finish their quilts.
The old rule use to be to press to the side… the dark side! This ‘rule’ originated when all piecing was done by hand, pressing to the side gave extra strength to the hand sewn seam.
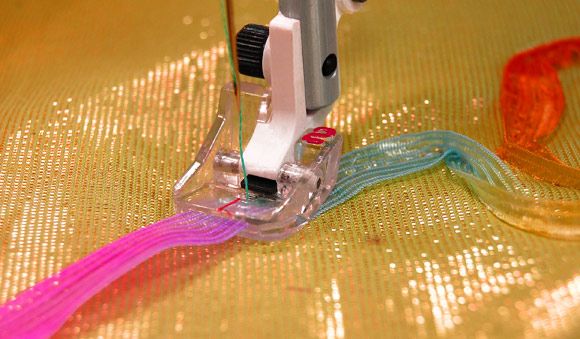
Pressing to the side does help secure the seam even today, with our fancy modern sewing machines. It is also easier to hide an open seam that was not secured during piecing. Most longarmers prefer to have seams pressed to the side if custom work or stitch in the ditch is required.
Pressing to the side gives the longarmer an edge to follow and bury the ditch stitching out of sight. Be cautious when pressing, give some thought to how you want the ditch to be stitched… if you need a long continuous stitch in the ditch, on a row for example, it is a better result if the pressing is long and continuous in that area instead of changing pressing direction in the middle of the row. Be sure to talk to your longarmer about what he or she prefers.
 Pressing to the dark side is probably how many of us initially learned how to piece and put our blocks together. With all things in life there has been an evolution in pressing and new methods have appeared on the “quilting block”.
There is a new trend for some projects to press the seams open. This technique allows the seams to lay perfectly flat, and is usually a dream to quilt an edge to edge design over… no bumps to worry about just a smooth flat surface to quilt away.
Some believe that pressing the seams open will cause them to become weak over time, and is more difficult to hide any open seams. If you are having custom quilting done, open seams do not leave a ditch to stitch in, if your longarmer stitches right in the seam, because it is pressed open, there is the possibility that the longarm needle could pierce the piecing thread and cause breakage; weakening the seam and eventually causing an open ‘hole’ on your quilt top.
Pressing seams open is a good idea when many seams come together in one spot… we will cover this in a later article. Think the middle of a pinwheel block.. many layers of fabric creating a bump in the middle of the block. This bump is difficult to stitch over and can cause needle break, skipped or extra long stitches. These bumps are also no fun for the end user to snuggle up in. I remember my first pinwheel quilt with the bumps…. that poor baby had to lay on top of all those bumps!
Lets talk final press for a moment.
The final pressing, when you have your entire top pieced together, is an important step that should not be forgotten!
The final press allows you to tell if there is fullness in the quilt top or borders. If you are unable to press flat do you think your longarmer will be able to? Fixing these issues saves your longarmer time and ends up with a better result in your quilting service. If they are not fixed prior to giving the quilt to your longarmer you are running the risk of addition fees to take out and redo seams, or even adding a tuck in the quilt top so it will lay flat so it is quilted without puckers.
Are there open seams that need to be sewn together?
Open seams can catch on the longarm as it moves across the quilt top and cause an even larger hole or tear in the fabric. The final press also allows you to double check for any stray threads or changes you would like to make prior to having your quilt longarmed. Fixing these issues save you money and your longarmer time!
A few last minute tips:
DON'T IRON, PRESS
'Pressing' is placing the iron in one spot and holding it there with little or no movement picking the iron up and placing it down again. Ironing is moving the iron around while touching the fabric.
Ironing can cause the fabric to stretch and change shape, especially if your fabric is cut on the bias or you are a fan of lots of steam!
SET YOUR SEAMS
This is one area that I sometimes follow my own advise and sometimes I am in a rush and forget to follow through! (Don’t tell the quilt police!) Setting your seams helps the thread to sink into the fabric. The theory is a less bulky seam and a more secure seam.
COOL BEFORE MOVING
This is particularly important if you love your steam. When you have pressed your fabric let it cool down before moving. If there is heat and steam and movement, you will end up with shifting of your fabric resulting in a block that is stretched out of shape and any bias edge will be out of wack!
GRAIN OF FABRIC IS IMPORTANT
When pressing a bias seam, press with the iron at a 45-degree angle to the seam and along the straight of grain to prevent distortion.
CONSIDER YOUR QUILT BLOCK
Try out a test block to see how you want things pressed. A good example would be flying geese unit. Pressing the bulk away from the point of the triangle would result in a crisp point instead of pressing the bulk toward the body of the triangle that may distort the point!
TALK TO YOUR LONGARMER
All the tips are great guidelines, however, everything depends on your preference and your project. Talk to your longarmer when you pick up or drop off your project, ask for ideas from him/her or areas that would be helpful to complete your project to gain the best result.
TIP FOR THE LONGARMER:
Hand Guided Machines when working from the front of the machine can move around any bulk area to avoid skip stitches over the bulk. When working a pantograph from the back identify areas of bulk that you want to avoid, using a dry erase marker mark areas you need to sew around by altering the pattern sewing path slightly to avoid the bulky areas. Be sure to do this with each new row if required.
Computer driven machines you can alter the pattern right on your screen! Place your machine head on the bulky area and using your crosshairs on the screen alter the pattern using nodes (design portion of your software) the pattern will sew right around the bulky area and no one will ever know the difference! (Using the design elements of your software are also helpful if you have an area you don’t want stitched on… say a photo quilt that you don’t want a face quilted over etc. )
Hi Paige!
Thanks for stopping by our blog post!
So happy the information was helpful.
We have a whole series planned on different techniques to help!
Stop by again soon and let us know if you have any questions.
Tracy
Thanks for these tips. It is good to know some of these things from the longarmers perspective.
Leave a comment